It is useful to visualize the commit timeline, called the revision graph.
Git commits form a timeline, as each corresponds to a point in time when you asked Git to save a snapshot of the tracked files prepared in the staging area. Except for the initial commit, each commit links to at least one previous commit, forming a structure that we can traverse.
A timeline of commits can have a name. Such a named timeline is called a branch. By default, Git names the initial branch master -- though many now use main instead. You'll learn more about branches in future lessons. For now, just be aware that the commits you create in a new repo will be on a branch called main (or master) by default.
gitGraph
    %%{init: { 'theme': 'default', 'gitGraph': {'mainBranchName': 'main (or master)'}} }%%
    commit id: "Add fruits.txt"
    commit id: "Update fruits.txt"
    commit id: "Add colours.txt"
    commit id: "..."
Git can show you the list of commits in a repo's history.
Preparation
Option 2: Continue with the sandbox from the previous hands-on practical
1 View the list of commits, which should show only the commit you just created.
Navigate into the repo folder and run the git log command to see the commit history.
cd hp-list-commits/things
git log
commit ... (HEAD -> main)
Author: ... <...@...>
Date: ...
Add fruits.txt
Use the Q key to exit the output screen of the git log command.
Note how the output includes details about the commit you just created. You can ignore most of them for now, but notice that it also shows the commit message you provided.
Expand the BRANCHES menu and click main to view the history graph, which contains only one node at the moment, representing the commit you just added. For now, ignore the label main attached to the commit.
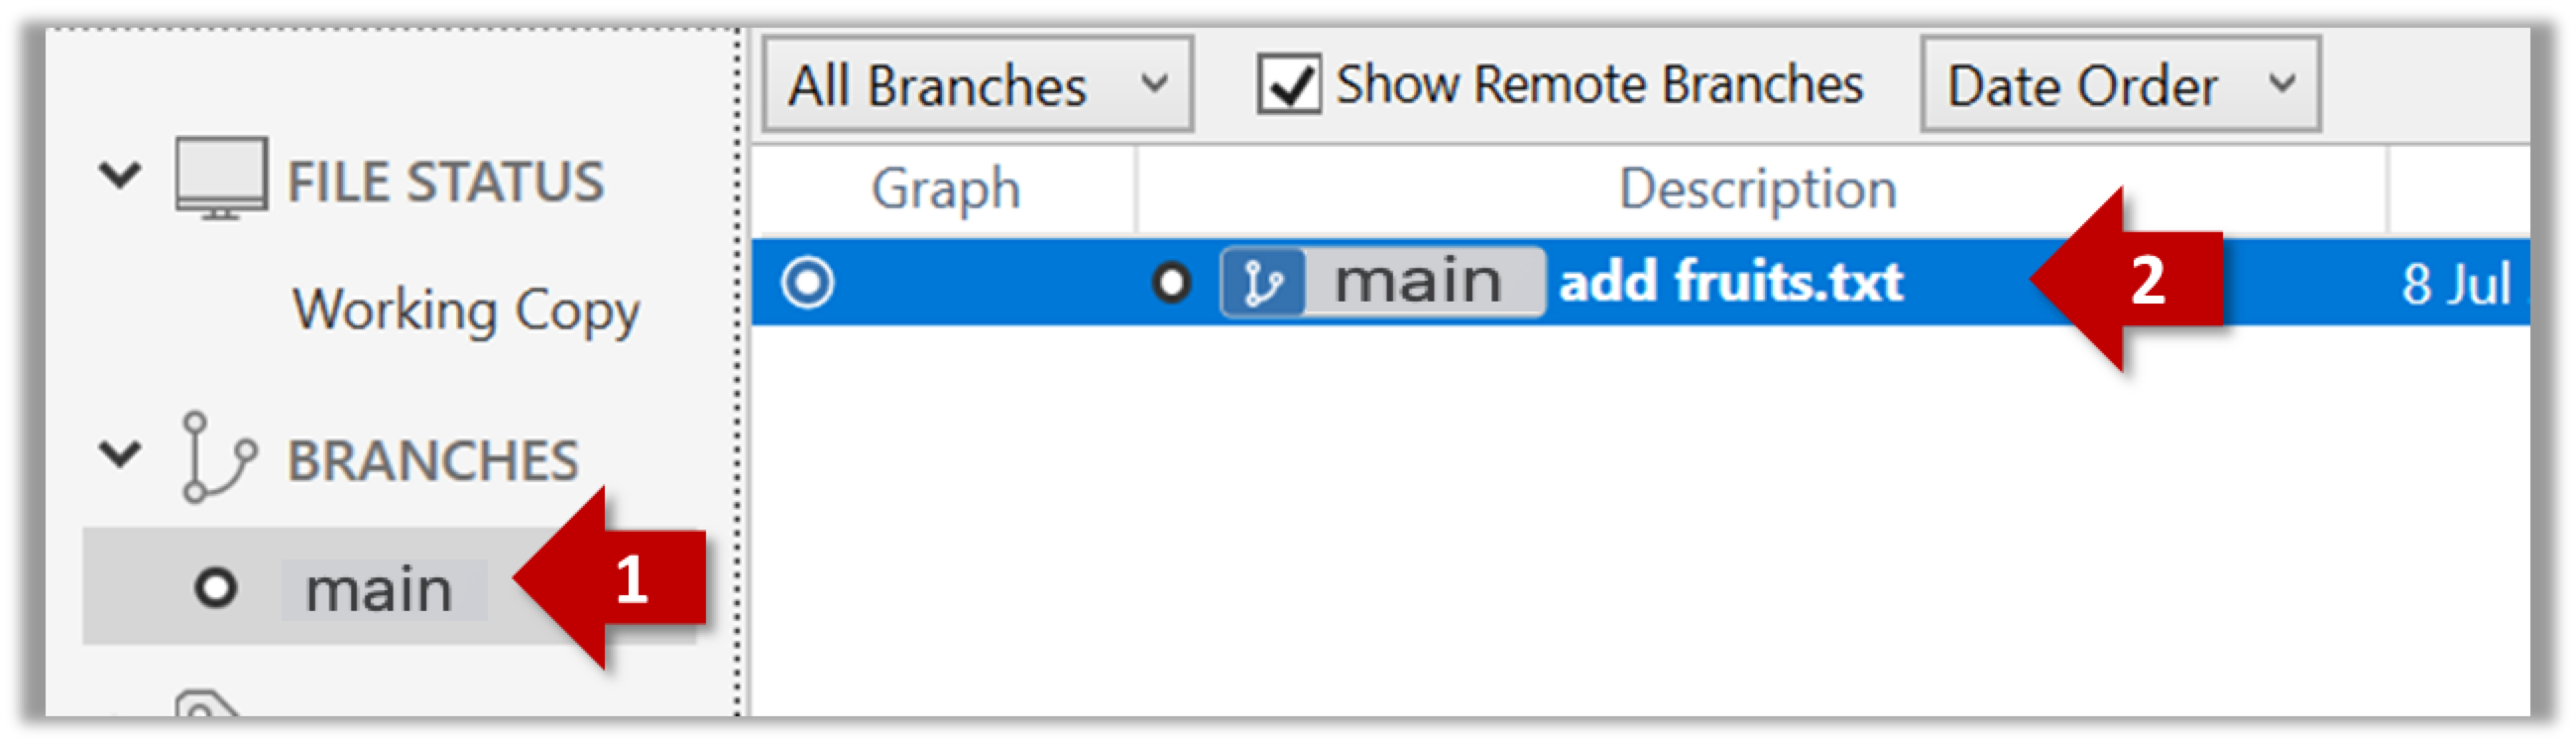
2 Create a few more commits (i.e., a few rounds of add/edit files → stage → commit), and observe how the list of commits grows.
Here is an example list of bash commands to add two commits while observing the list of commits after each commit.
echo "figs" >> fruits.txt # add another line to fruits.txt
git add fruits.txt # stage the updated file
git commit -m "Insert figs into fruits.txt" # commit the changes
git log # check commits list
echo "a file for colours" >> colours.txt # add a colours.txt file
echo "a file for shapes" >> shapes.txt # add a shapes.txt file
git add colours.txt shapes.txt # stage both files in one go
git commit -m "Add colours.txt, shapes.txt" # commit the changes
git log # check commits list
You can copy-paste a list of commands (such as the commands above), including any comments, to the terminal. After that, press Enter to run them in sequence.
zsh users: If the terminal reports an error because of comments starting with #, you may need to enable the interactive comments feature in your terminal (e.g., add the line setopt INTERACTIVE_COMMENTS to your ~/.zshrc).
The output of the final git log should be something like this:
commit ... (HEAD -> main)
Author: ... <...@...>
Date: ...
Add colours.txt, shapes.txt
commit ...
Author: ... <...@...>
Date: ...
Insert figs into fruits.txt
commit ...
Author: ... <...@...>
Date: ...
Add fruits.txt
SIDEBAR: Working with the 'less' pager
Some Git commands -- such as git log -- may show their output through a pager. A pager is a program that lets you view long text one screen at a time, so you don't miss anything that scrolls off the top. For example, git log output will temporarily hide the current terminal content and enter a pager view that shows the output one screen at a time. When you exit the pager, the git log output will disappear from view, and the previous content of the terminal will reappear.
command 1
output 1
git log
→
commit f761ea63738a...
Author: ... <...@...>
Date: Sat ...
Add colours.txt
By default, Git uses a pager called less. Below are some useful commands for the less pager.
| Command | Description |
|---|---|
q | Quit less and return to the terminal |
↓ or j | Move down one line |
↑ or k | Move up one line |
Space | Move down one screen |
b | Move up one screen |
G | Go to the end of the content |
g | Go to the beginning of the content |
/pattern | Search forward for pattern (e.g., /fix) |
n | Repeat the last search (forward) |
N | Repeat the last search (backward) |
h | Show help screen with all less commands |
If you'd rather see the output directly, without using a pager, you can add the --no-pager flag to the command, for example:
git --no-pager log
You can also configure Git not to use less, to use a different pager, or to fine-tune how less behaves. For example, you can reduce Git's use of the pager (recommended) by using the following command:
git config --global core.pager "less -FRX"
Explanation: -FRX is shorthand for combining the following three flags.
-F: Quits if the output fits on one screen (don't show pager unnecessarily)-R: Shows raw control characters (for colored Git output)-X: Keeps content visible after quitting the pager (so output stays on the terminal)
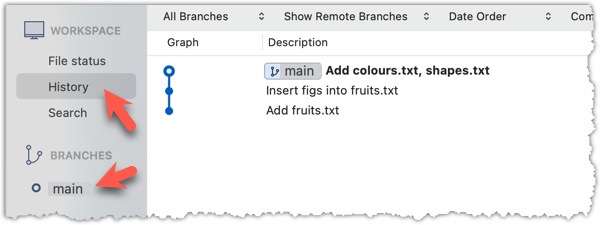
To see the list of commits, click on the History item (listed under the WORKSPACE section) on the menu on the right edge of Sourcetree.

After adding two more commits, the list of commits should look something like this:
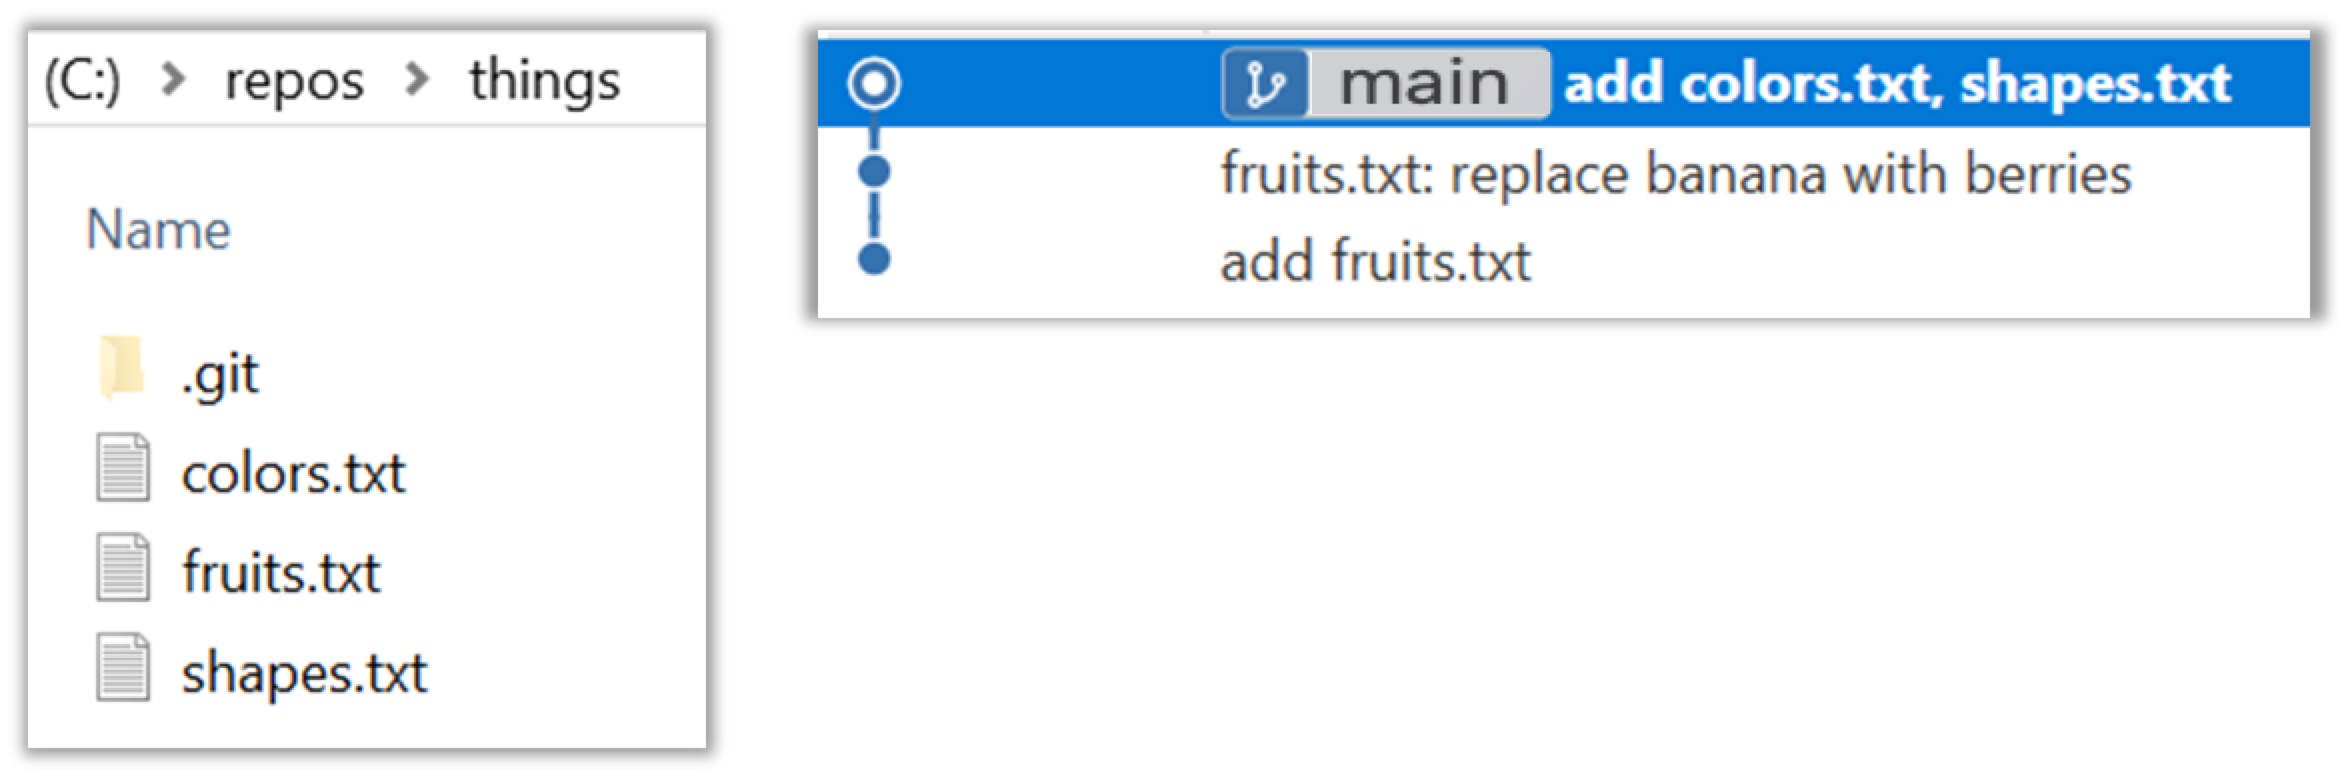
done!
The Git data model consists of two types of entities: objects and refs (short for references). In this lesson, you will encounter examples of both.
A Git commit graph (also called a revision graph) is a visualization of a repo's revision history, consisting of one or more branches. First, let us work with a simpler revision graph that has one branch, such as the one below.
- Nodes in the revision graph represent commits. A commit is one of four main types of Git objects. For completeness, the other three are:
- blob (short for binary large object): stores the contents of a file
- tree: represents a directory and records the hierarchy of its contents by referencing blobs and other trees
- tag (specifically, annotated tag): a label-like object that can store additional metadata and point to a specific commit
- A commit is identified by its SHA value. A SHA (Secure Hash Algorithm) value is a unique identifier generated by Git to represent each commit. In the usual Git repository format, it is produced by applying SHA-1 (i.e., one of the algorithms in the SHA family of cryptographic hash functions) to the contents of the commit object. It's a 40-character hexadecimal string (e.g.,
f761ea63738a67258628e9e54095b88ea67d95e2) that acts like a fingerprint, ensuring that every commit can be referenced unambiguously. That is, every commit has a unique hash value. Tell me more about the use of SHA - A commit is a full snapshot of all tracked files, based on the versions prepared in the staging area at commit time. That means each commit (except the initial commit) is based on another 'parent' commit. Some commits can have multiple parent commits -- we'll cover that later.
Because every commit has a unique hash, the commit hash values in our examples will differ from your own commit hash values when you follow our hands-on practicals.
Edges in the revision graph represent links between a commit and its parent commit(s). In some revision graph visualizations, you might see arrows (instead of lines) showing how each commit points to its parent commit.
Git uses refs to name and keep track of various points in a repository's history. These refs are essentially named pointers that can serve as bookmarks to reach a certain point in the revision graph using the ref name.
In the revision graph above, there are two refs main and ←HEAD.
- main is a branch ref. A branch ref points to the latest commit on a branch. In this visualization, the commit shown alongside the ref is the one it points to, i.e.,
C3.
When you create a new commit, the branch ref of the branch moves to the new commit.
You'll be learning more about Git branches in a later lesson. - ←HEAD is a special ref that typically points to the current branch and moves along with that branch ref. In this example, it is pointing to the
mainbranch.
In certain cases, theHEADmay point directly to a specific commit instead of a branch. This situation is called a 'detachedHEAD'; a later lesson covers it.
Target Use Git to examine the revision graph of a simple repo.
Preparation
Option 2: Continue with the sandbox from the previous hands-on practical
1 First, use a simple git log to view the list of commits.
git log
commit f761ea63738a... (HEAD -> main)
Author: ... <...@...>
Date: Sat ...
Add colours.txt, shapes.txt
commit 2bedace69990...
Author: ... <...@...>
Date: Sat ...
Insert figs into fruits.txt
commit d5f91de5f0b5...
Author: ... <...@...>
Date: Fri ...
Add fruits.txt
Below is the visual representation of the same revision graph. As you can see, the log output shows the refs slightly differently, but you can still match them to the same refs.
2 Use the --oneline flag to get a more concise view. Note how the commit SHA has been truncated to the first seven characters (the first seven characters of a commit SHA are enough for Git to identify a commit).
git log --oneline
f761ea6 (HEAD -> main) Add colours.txt, shapes.txt
2bedace Insert figs into fruits.txt
d5f91de Add fruits.txt
3 The --graph flag makes the result closer to a graphical revision graph. Note the * that indicates a node in a revision graph.
git log --oneline --graph
* f761ea6 (HEAD -> main) Add colours.txt, shapes.txt
* 2bedace Insert figs into fruits.txt
* d5f91de Add fruits.txt
The --graph option is more useful when examining a revision graph with multiple parallel branches (branches will be covered in a later lesson).
Click History to see the revision graph.
- In some versions of Sourcetree, the
HEADref may not be shown -- it is implied that theHEADref points to the same commit as the current branch ref.
done!