Target Usage: To contribute to a project using GitHub's pull request mechanism.
Motivation: Pull Request (PR) is the most common way to contribute to a project hosted on GitHub.
Lesson plan:
T9L1. Creating Pull Requests covers that part.
T9L2. Reviewing Pull Requests covers that part.
T9L3. Merging Pull Requests covers that part.
Another way to contribute to a GitHub project is by giving input via a pull request review.
PR reviews are a collaborative process in which project members examine and provide feedback on PRs submitted to a remote repo. After an initial review, the reviewer may suggest improvements or identify issues, prompting the submitter to refine and update their code in the PR. This review-refine-update cycle can repeat several times, with reviewers reassessing each new iteration until all feedback is addressed and the code meets the team’s expectations. Once approved, the PR can be merged, making the changes an official part of the codebase.
Preparation If you do not have access to a PR that you can review, you can create one for yourself as follows:
- Create a branch in a repo that you have forked and cloned (e.g., samplerepo-pr-practice).
- Make some changes in the branch.
- Push the branch to the remote repo.
- Create a PR within your fork, from the new branch to the
mainbranch.
1 Locate the PR:
- Go to the GitHub page of the repo.
- Click on the Pull requests tab.
- Click on the PR you want to review.
2Read the PR description. It might contain information relevant to reviewing the PR.
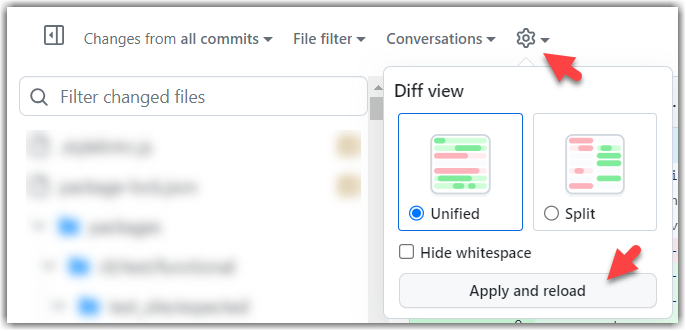
3Click on the Files changed tab to see the diff view.
You can use the following setting to try the two different views available and pick the one you like.
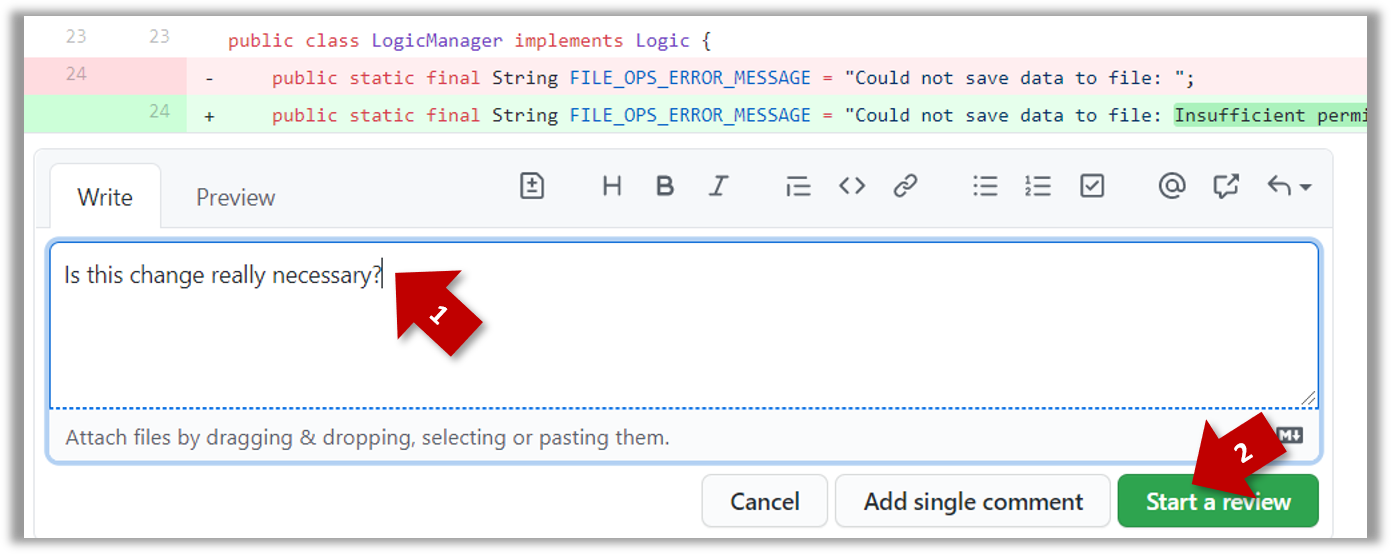
4Add review comments:
- Hover over the line you want to comment on and click on the icon that appears on the left margin. That should create a text box for you to enter your comment.
- To give a comment related to multiple lines, click-and-drag the icon. The result will look like this:
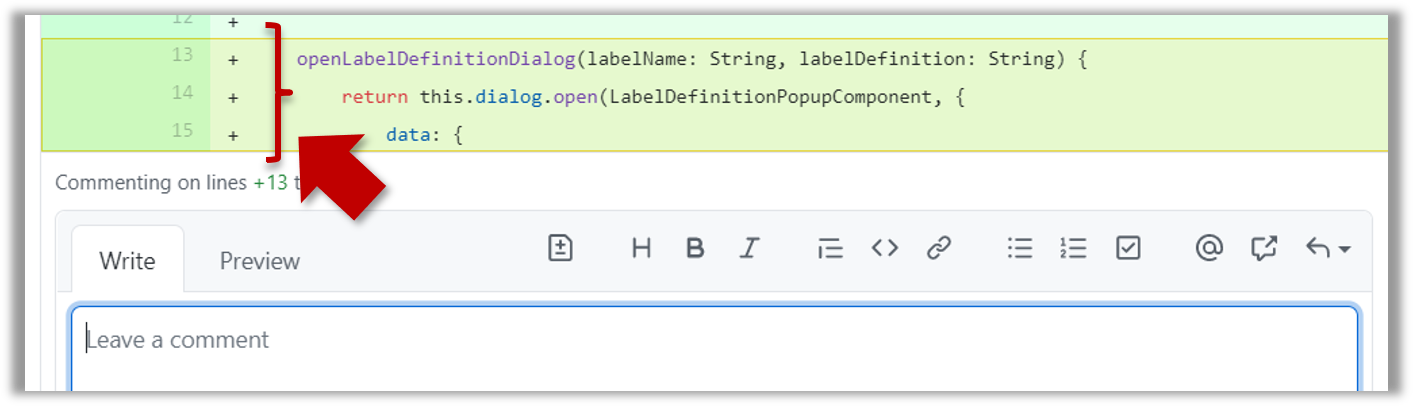
- To give a comment related to multiple lines, click-and-drag the icon. The result will look like this:
- Enter your comment.
- This page @SE-EDU/guides has some best practices PR reviewers can follow.
- To suggest an in-line code change, click on this icon:
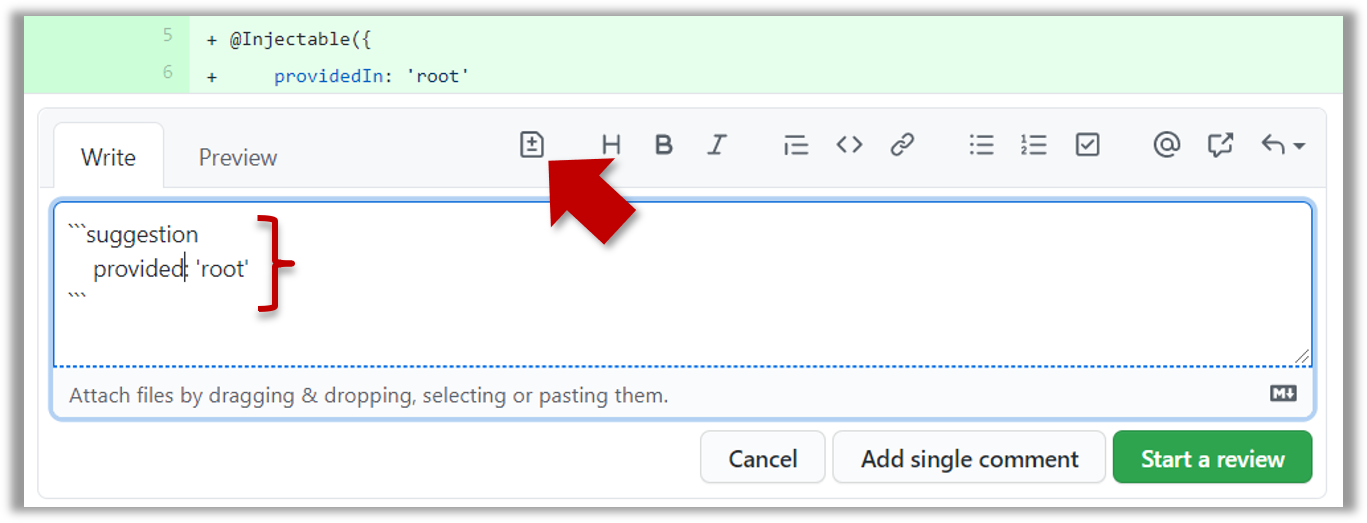
After that, you can proceed to edit thesuggestioncode block generated by GitHub (as seen in the screenshot above).
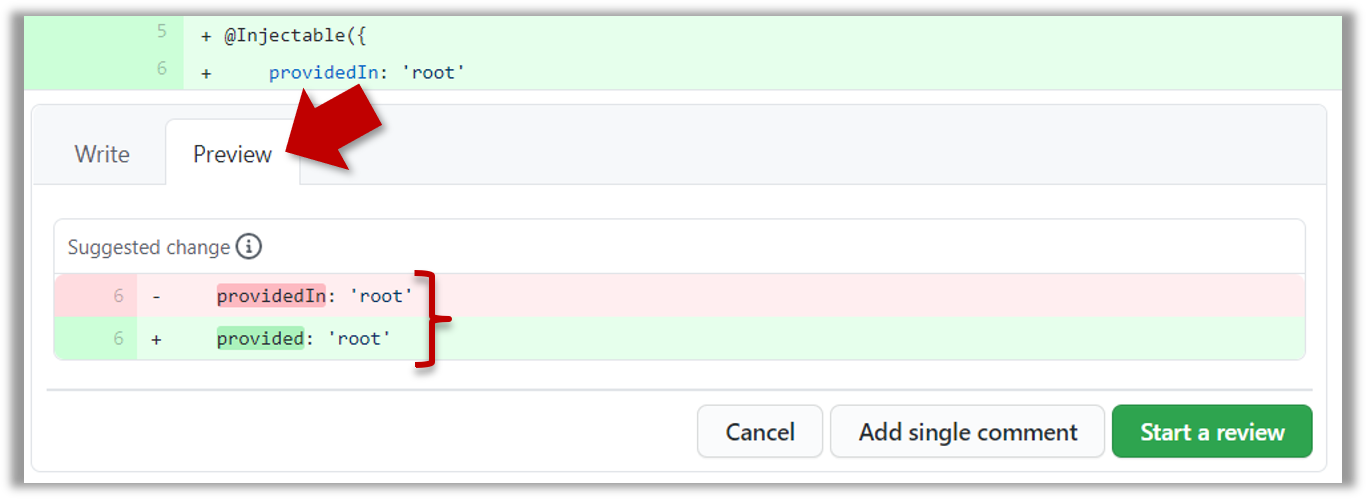
The comment will look like this to the viewers:
- After typing in the comment, click on the Start a review button (not the Add single comment button. This way, your comment is saved but not visible to others yet. It will be visible to others only when you have finished the entire review.
- Repeat the above steps to add more comments.
5Submit the review:
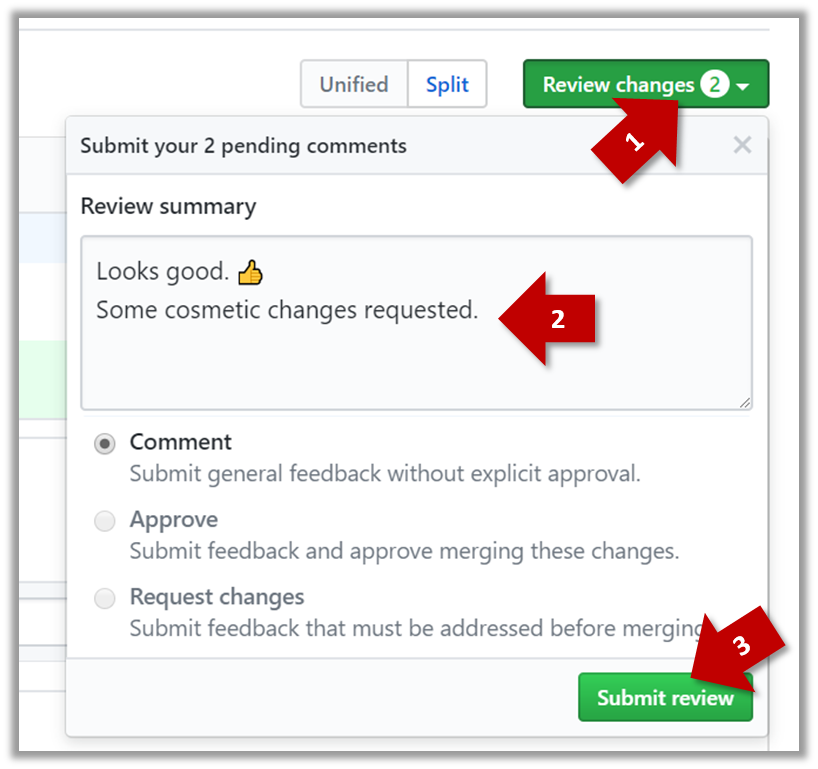
- When there are no more comments to add, click on the Review changes button (on the top right of the diff page).
- Type in an overall comment about the PR, if any. e.g.,
Overall, I found your code easy to read for the most part, except in a few places where the nesting was too deep. I noted a few minor coding standard violations too. Some of the classes are getting quite long. Consider splitting into smaller classes if that makes sense.LGTMis often used in such overall comments, to indicateLooks good to me(orLooks good to merge).
nit(as in nit-picking) is another such term, used to indicate minor flaws e.g.,LGTM. Just a few nits to fix.. - Choose the
Approve,Comment, orRequest changesoption as appropriate and click on the Submit review button.
done!
If you have an appropriate level of access to a GitHub repo, you can merge pull requests.
A project member with sufficient access to the remote repo can merge a PR, incorporating proposed changes into the main codebase. Merging a PR is similar to performing a Git merge in a local repo, except that it occurs in the remote repository.
Preparation If you would like to try merging a PR yourself, you can create a dummy PR using these steps.
- Create a branch in a repo that you have forked and cloned (e.g., samplerepo-pr-practice).
- Make some changes in the branch.
- Push the branch to the remote repo.
- Create a PR within your fork, from the new branch to the
mainbranch.
1 Locate the PR to be merged in your repo's GitHub page.
2 Click on the Conversation tab and scroll to the bottom. You'll see a panel containing the PR status summary.
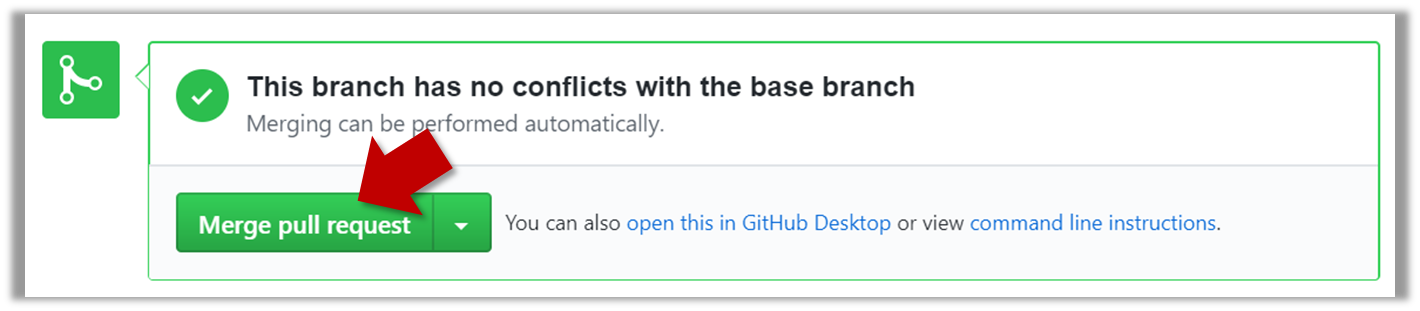
3 If the PR is not merge-able in the current state, the Merge pull request will not be green. Here are the possible reasons and remedies:
- Problem: The PR code is out-of-date, indicated by the message This branch is out-of-date with the base branch. That means the repo's
mainbranch has been updated since the PR code was last updated.- If the PR author has allowed you to update the PR and you have sufficient permissions, GitHub will allow you to update the PR simply by clicking the Update branch on the right side of the 'out-of-date' error message. If that option is not available, post a message in the PR requesting the PR author to update the PR.
- Problem: There are merge conflicts, indicated by the message This branch has conflicts that must be resolved. That means the repo's
mainbranch has been updated since the PR code was last updated, in a way that the PR code conflicts with the currentmainbranch. Those conflicts must be resolved before the PR can be merged.- If the conflicts are simple, GitHub might allow you to resolve them using the Web interface.
- If that option is not available, post a message in the PR requesting the PR author to update the PR.
4 Merge the PR by clicking on the Merge pull request button, followed by the Confirm merge button. You should see a Pull request successfully merged and closed message after the PR is merged.
- You can choose between three merging options by clicking on the down-arrow in the Merge pull request button. If you are new to Git and GitHub, the
Create merge commitoption is recommended.
done!
After a PR is merged, you need to sync other related repos. Merging a PR updates only the upstream remote repository where it was merged. The PR author (and other repo members) need to pull the merged code from the upstream repo to their local repos, then push it to their forks to sync those forks with the upstream repo.
At this point: Now you can contribute to a GitHub project by creating, reviewing, and even merging PRs in a GitHub repository.
What's next: Tour 10: Managing Git-Based Projects